Refactor the code created previously then search for data based on specific criteria. Use lambda notation when using the toolbox. Store results in specific objects.

In this second article in the series, we will see how to refactor code, use lambdas and make queries with specific criteria.
The code presented is available on Gitlab. The branch corresponding to this article is02-enhancing-requesting.
In the previous article, the Elastic client was defined in the Indices class. We are going to export its creation to a configuration class, via a dedicated bean.
@Configuration
public class ElasticClientBean {

    @Value("${elastic.host}")
    private String elasticHost;

    @Value("${elastic.port}")
    private int elasticPort;

    @Value("${elastic.ca.fingerprint}")
    private String fingerPrint;

    @Value("${elastic.apikey}")
    private String apiKey;

    @Value("${elastic.scheme}")
    private String elasticScheme;

    @Bean
    @Scope(value = ConfigurableBeanFactory.SCOPE_SINGLETON)
    public ElasticsearchClient elasticClient() {

        RestClient restClient = RestClient
                .builder(new HttpHost(elasticHost, elasticPort, elasticScheme))
                .setHttpClientConfigCallback(hccc -> hccc.setSSLContext(sslContext))
                .setDefaultHeaders(new Header[] {
                        new BasicHeader("Authorization", "ApiKey " + apiKey),
                })
                .build();

        ElasticsearchTransport transport = new RestClientTransport(restClient, new JacksonJsonpMapper());

        return new ElasticsearchClient(transport);

    }

}
Incidentally, the authentication mode has been changed.
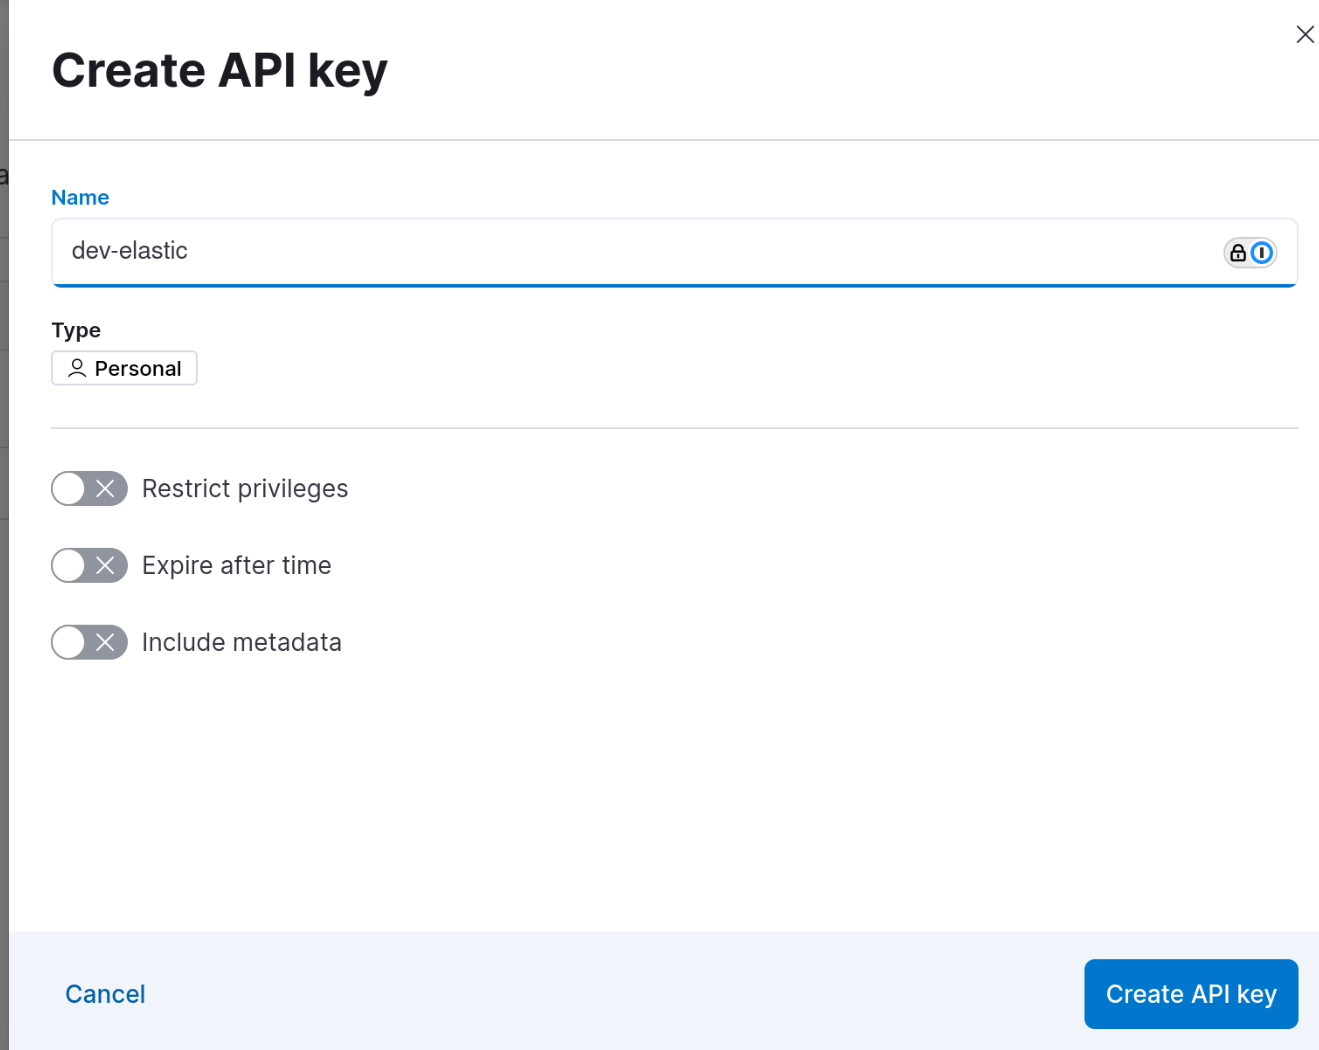
Instead of using traditional login credentials, we will create an API key.
The menu is accessible in Kibana via Stack Management -> Security -> API keys.
You must start by creating the API key by defining the associated rights and the validity period if necessary.

The key value is only displayed once when it is created. Warning: The value displayed does not correspond to the value copied by clicking on the copy icon.

The first thing to do in this service is to initialize the Elasticsearch client.
@Service
public class OrderService {

    private ElasticsearchClient elasticClient;

    @Autowired
    public void setElasticClient(ElasticsearchClient elasticClient) {
        this.elasticClient = elasticClient;
    }
In this service, we will define two methods:
A method to retrieve the number of orders for a given email address.
A method for obtaining order details for a given email address.
We will therefore start by defining a constant which will contain the name of the field which will allow us to filter the search results. :
public static final String EMAIL_FIELD = "email";

public static final String INDEX_NAME = "kibana_sample_data_ecommerce";
Then, the first method which allows you to count the results.
public long findNumberOfOrdersForMail(String email) {

    try {

        CountResponse response = elasticClient.count(c -> c
                .index(INDEX_NAME)
                .query(q -> q
                        .match(m -> m
                                .field(EMAIL_FIELD)
                                .query(email))));

        return response.count();
    } catch (IOException e) {
        throw new RuntimeException(e);
    }

}
We can see that for each operation, there is a dedicated response type.
The CountResponse therefore clearly indicates that we are not going to bring back any data other than a document number.
The query is made using lambda notation.
The search method used is one of the simplest: a match, which will fetch a precise value (whether in terms of case or content) in a precise field of the index.
We can then create our test class to check that the returned results correspond to expectations.
@SpringBootTest
class OrderTest {

    @Autowired
    OrderService orderService;

    @Test
    void countOrdersByEmail() {

        long count = orderService.findNumberOfOrdersForMail("mary@bailey-family.zzz");
        assertNotEquals(0, count);
        assertEquals(3, count);

    }

}
In the Dev Tools, the corresponding query is as follows:
GET kibana_sample_data_ecommerce/_count
{
  "query": {
    "match": {
      "email": "mary@bailey-family.zzz"
    }
  }
}
Then the answer looks like:
{
  "count": 3,
  "_shards": {
    "total": 1,
    "successful": 1,
    "skipped": 0,
    "failed": 0
  }
}
Now that we know how to count documents, we will be able to recover them to use them.
public List<Object> listOrdersByEmail(String email) {

    try {
        SearchResponse<Object> response = elasticClient.search(s -> s
                .index(INDEX_NAME)
                        .query(q -> q
                                .match(m -> m
                                        .field(EMAIL_FIELD)
                                        .query(email)))
                , Object.class);

        if (response.hits().total() == null || response.hits().total().value() == 0) {
            return new ArrayList<>();
        }

        return new ArrayList<>(response.hits().hits());

    } catch (IOException e) {
        throw new RuntimeException(e);
    }

}
The response type therefore changes to SearchResponse.
With this code, we retrieve a list of objects, but it is possible to specialize the code to retrieve a specific type of object which will be deserialized using Jackson.
We have to start by defining the object :
public class Order {

    @JsonProperty("currency")
    private String currency;

    @JsonProperty("customer_first_name")
    private String customerFirstName;

    @JsonProperty("customer_last_name")
    private String customerLastName;

    @JsonProperty("customer_full_name")
    private String customerFullName;

    @JsonProperty("email")
    private String email;

    @JsonProperty("order_date")
    private ZonedDateTime orderDate;

    @JsonProperty("taxful_total_price")
    private double taxfulTotalPrice;

    @JsonProperty("taxless_total_price")
    private double taxlessTotalPrice;

    public Order(String currency, String customerFirstName, String customerLastName, String customerFullName,
                 String email, ZonedDateTime orderDate, double taxfulTotalPrice, double taxlessTotalPrice) {
        this.currency = currency;
        this.customerFirstName = customerFirstName;
        this.customerLastName = customerLastName;
        this.customerFullName = customerFullName;
        this.email = email;
        this.orderDate = orderDate;
        this.taxfulTotalPrice = taxfulTotalPrice;
        this.taxlessTotalPrice = taxlessTotalPrice;
    }

    public Order() {
    }

    @Override
    public String toString() {
        return "Order{" +
                "currency='" + currency + '\'' +
                ", customerFirstName='" + customerFirstName + '\'' +
                ", customerLastName='" + customerLastName + '\'' +
                ", customerFullName='" + customerFullName + '\'' +
                ", email='" + email + '\'' +
                ", orderDate=" + orderDate +
                ", taxfulTotalPrice=" + taxfulTotalPrice +
                ", taxlessTotalPrice=" + taxlessTotalPrice +
                '}';
    }

    /* Getters and setters */
I draw attention to the definition of orderDate.
If we look at the field in Dev Tools, we can see that the date is in a particular format:
2024-03-03T21:59:02+00:00
This is a zoned format, the date type must therefore integrate this particularity and be ZonedDateTime.
For deserialization to go well, you must modify the creation of the Elasticsearch client and configure the JsonpMapper. The line
ElasticsearchTransport transport = new RestClientTransport(restClient, new JacksonJsonpMapper());
Then becomes
        ObjectMapper mapper = new ObjectMapper();
        mapper.configure(DeserializationFeature.FAIL_ON_UNKNOWN_PROPERTIES, false);
        mapper.setSerializationInclusion(JsonInclude.Include.NON_EMPTY);
        mapper.registerModule(new JavaTimeModule());
        JacksonJsonpMapper jacksonJsonpMapper = new JacksonJsonpMapper(mapper);

        ElasticsearchTransport transport = new RestClientTransport(restClient, jacksonJsonpMapper);
We must then modify the query to specialize it:
public List<Hit<Order>> listOrdersByEmail(String email) {

    try {
        SearchResponse<Order> response = elasticClient.search(s -> s
                .index(INDEX_NAME)
                        .query(q -> q
                                .match(m -> m
                                        .field(EMAIL_FIELD)
                                        .query(email)))
                , Order.class);

        if (response.hits().total() == null || response.hits().total().value() == 0) {
            return new ArrayList<>();
        }

        return response.hits().hits();

    } catch (IOException e) {
        throw new RuntimeException(e);
    }

}
It then remains to write the corresponding test method:
@Test
void listOrdersByEmail() {

    List<Hit<Order>> orders = orderService.listOrdersByEmail("mary@bailey-family.zzz");
    assertNotNull(orders);
    assertEquals(3, orders.size());
    for (Hit<Order> hit : orders) {
        System.out.println(hit.source());
    }

}
We can see that to access the “Order” object, you must use the “source()” method of the Hit object.